Climbing Essentials
Complete guide to outfitting your van for every climbing style across Europe
About This Guide
Everything in this article is based on our personal setup and experience from 2+ years of van climbing across Europe. This isn’t universal truth—it’s one approach that works for us. Everyone’s needs are different. Your budget might be lower, your climbing style different, your vehicle different, or your priorities completely different from ours.
The purpose of this guide: To help if you’re wondering what to include in your climbing van, how to organise gear, or if you’re doubting your own choices. If you have specific questions about our setup or want to discuss alternatives based on your situation, we’re happy to help. This is meant to spark ideas and provide one reference point—not prescribe the “correct” way to do vanlife climbing.
 Storage & Organisation: Vanlife Climbing Logistics
 Storage & Organisation: Vanlife Climbing Logistics
You have one van. The van climbing essentials you need are sport gear, trad gear, multi-pitch gear, daily clothes, food, water, everything. Organisation separates climbers who are frustrated all the time from climbers who are actually ready to climb.
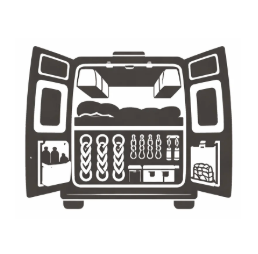
The Storage Reality
Our van has approximately 6 cubic meters of usable interior space. We carry gear for 5+ different climbing styles plus daily living supplies. This requires ruthless organisation and the right storage system.
Gear Storage Zones
🎒 Sport Climbing — Always-Ready Pack
- Contents: 60m rope, 14-16 quickdraws, 2 belay devices, carabiners, chalk, brush
- Access: Zip open, grab, go — no other gear needed for most European sport crags
- Organisation: Rope in rope bag (prevents kinks, blocks UV); quickdraws on gate keeper
- Rotation: Check rope condition monthly — internal fibres can degrade unseen
⚙️ Trad Gear — Specialized Protection
- Cam rack: Duplicates 0.5-2.0″, labeled with colored tape by size
- Nut set: 13-16 nuts in dedicated nut tool
- Slings: 6-8 cordelette slings colored by length
- Extra QDs: 6-8 separate draws for trad anchors
- Pro tip: Photograph your full rack from above before leaving any crag
- Longevity: Cam lobe sleeves prevent snagging — extends life by years
🏔️ Multi-Pitch Gear
- 2x 60m ropes kept separate from sport rope
- Prusik loops + backup sling system
- Additional anchor-building slings
- Cordelette + 60m 7-8mm tag line
- Why separate: Different wear characteristics — mixing causes crag confusion
👟 Climbing Shoes & Clothing
Quality all-around shoe. Cleaned, dried, inspected every session. €80-120 · lasts 120-150 days
Secondhand gym shoe €20-40. Zero guilt in water. Keeps primary pristine.
- Drying: Air dry immediately after every session — stuffed newspaper absorbs moisture
🛠️ Emergency & Repair Kit — small things that prevent big problems
- Electrical tape + duct tape (rope repair, gear reinforcement)
- Sewing kit + replacement quickdraw parts (gates, springs)
- Backup carabiners (if one gets damaged, you’re not stranded)
- Replacement chalk + brush
- First aid kit for climbing injuries (taped fingers, joint support, painkillers)
Daily Accessibility vs. Seasonal Storage
Gear you use frequently (sport draws, chalk, brush) lives in easy-access areas. Gear you use occasionally (winter climbing layers, summer-only items) goes under the bed or in overhead storage that requires moving things to access.
Critical organisation principle: If you can’t find gear in under 2 minutes at the crag, your system has failed. Spend an hour organizing now to save hours of frustration later.

Power & Water: Self-Sufficiency for Extended Climbing
 Power & Water: Self-Sufficiency for Extended Climbing
You’re at a crag for 5 days. No showers available. Water and power aren’t luxuries—they’re operational requirements. Proper systems allow you to stay comfortable and healthy for extended trips.
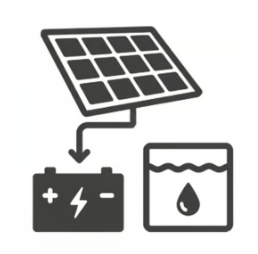
Power System: Solar + Battery Architecture
Solar Panel Array
- Capacity: 450W total (3x150W rigid monocrystalline panels on roof)
- Why this size: Generates 1.5-2.2 kWh daily in good sun (varies by latitude and season)
- Winter consideration: Alpine areas = clearer skies than northern European coasts, despite shorter days
- Installation: Roof-mounted with tilt brackets (adjustable angle increases winter output 15-20%)
- Cost: €600-800 for quality panels + €400-600 installation = €1,000-1,400
Battery System: Lithium LiFePO4
Lithium is more expensive than lead-acid but worth every euro for vanlife climbing.
- Capacity: 200Ah at 48V (9.6 kWh usable) — allows 3-4 days power independence with moderate usage
- Why lithium:
- 95%+ efficiency vs 80% for lead-acid (more usable power)
- 5,000+ cycle lifespan vs 800-1,200 for lead-acid (last 10+ years)
- No maintenance (no water top-ups, no sulfation recovery)
- Cold weather performance (critical when climbing in alpine regions)
- Integrated BMS protects from overcharging and dangerous voltage spikes
- Cost: €2,500-3,500 for quality LiFePO4
Charging System & Controllers: Victron Energy
We can only recommend Victron Energy. They’re the top brand for van electrical systems, and the integrated monitoring changes everything about system management.
- MPPT Solar Charge Controller: Victron SmartSolar 100/100 or similar (optimises panel output into battery). Cost: €500-700
- Battery Management System (BMS): Victron integrated or standalone, protects LiFePO4 from overcharging/dangerous voltage spikes. Cost: €400-600
- DC-to-DC Charger: Victron Orion-Tr 48/16 or equivalent (charges battery from vehicle alternator while driving). Cost: €600-800
- Remote Monitoring: Victron’s Bluetooth/GX integration allows you to monitor battery state of charge, solar input, DC loads, and inverter status from your phone in real-time. Cost: €100-200 for Color Control GX
- Backup shore power: 2000W pure sine wave inverter (Victron MultiPlus) for AC charging from campground power if needed. Cost: €1,200-1,500
- Total Victron system cost: €5,000-6,500 (panels, battery, all controllers, monitoring, installation)
Why Victron matters: The single network monitoring is a game-changer. One app shows your entire power ecosystem. Battery at 60%? You know it immediately. Solar producing 800W? You see it in real-time. Making power/water decisions based on actual data, not guesses, transforms van living from stressful to manageable.
Daily Power Usage & Management
| Device | Daily Usage | Power Draw |
|---|---|---|
| Lights (LED) | 8-10 hours | 100-150Wh |
| Laptop + Phone charging | 4-5 hours | 500-800Wh |
| Fridge (12V) | 24 hours | 1,500-2,000Wh |
| Water pump | 15-20 min/day | 150-250Wh |
| Maxxfan + ventilation | 6-8 hours | 300-400Wh |
| Daily Total | 2,600-3,600Wh |
Daily usage (~3.2 kWh) vs solar generation on good day (2 kWh) shows why battery capacity matters. Cloudy days, winter, or heavy usage days require battery reserves.
Water System: Tank Capacity & Management
💧 Fresh Water
- Food-grade plastic tank
- Most campsites refill free
- Worst case €1-2 at water points
🪣 Greywater
- 100% separate from fresh water
- Dispose at campsites or dump stations
- Use biodegradable soap only
Typical daily fresh water usage:
| Activity | Daily Amount |
|---|---|
| Drinking | 2L |
| Cooking | 2L |
| Washing (hands, face, teeth) | 5L |
| Showers (every 2-3 days, averaged) | 10-15L |
| Total per day | 19-24L |
Reality check: Showers use a lot of water (15L each). If water is limited, take quicker showers (5L) more frequently instead of thorough showers every 3 days. Your skin stays healthier and you feel fresher overall.
Integration With Climbing Schedule
On climbing days (high exertion, sweat production), water usage increases 30-40%. Plan refill days strategically—refill after a rest day when water usage is lower, before a hard climbing day when you’ll need showers.
Sport climbing is the most accessible climbing style for van-lifers in Europe. Most single-pitch crags are sport, bolts are common, and the required gear is relatively simple compared to trad.
Core Requirements
Rope
- 60m minimum covers 90% of European sport crags — 70m ideal
- 9.5-10mm diameter — thicker lasts longer, thinner climbs easier
- Dynamic only — absorbs fall shock, prevents injuries
- Lifespan: 5-8 years with proper care
Quickdraws
- 14-16 draws for typical European single-pitch (40-50m)
- Each draw = top carabiner + rope carabiner + sewn webbing
- Don’t cheap out on carabiners — €5-8 each vs €2-3 garbage. They’re your direct link to the bolt
- Check gates for burrs before every use
- Store dry, avoid UV, rinse salt water immediately
Belay Device — ATC Black Diamond
- One device for everything — sport, multi-pitch, double roping
- Why ATC only: handles single and double rope seamlessly, no switching between systems
- More attention than mechanical devices, but becomes second nature — and faster
Carabiners
- 2 locking carabiners for anchoring and rope management
- 4-6 regular carabiners for attaching gear and belay adjustments
- €15-20 per locking biner — 2 minimum for safety
Supporting Gear
Chalk & Brush
Brush essential for European limestone & sandstone
Climbing Shoes
See Zone 4 for our full shoe strategy
Harness
Check stitching yearly. Belay loop fraying = retire immediately
Locking Biners
2 minimum for safety
European Sport Climbing Specifics
Bolt quality varies: UK bolts are typically well-maintained. French bolts are sometimes rusty. Spanish bolts are often excellent. Always check bolts visually before clipping. A visual inspection takes 30 seconds. Rope failure from a bad bolt is permanent.
Slings at anchors: Many European crags use slings instead of bolts for anchors. Condition varies. When you reach the anchor, visually inspect the sling. Worn slings are common — place your own if unsure.
Multi-bolt anchors: Some routes require equalising between two bolts. Bring additional slings for this purpose (not counted in your main quickdraws).
Our favourite brands: Mammut Petzl Edelrid Black Diamond DMM
Van Climbing Essentials: Sport Climbing Gear Summary
- Rope: 60-70m dynamic rope (€150-200)
- Quickdraws: 14-16 quality sets (€80-120)
- Belay device: ATC Black Diamond (€20-30)
- Carabiners: 6-8 locking + regular (€60-100)
- Shoes & harness: €100-160 (primary pair + secondhand DWS pair)
- Total dedicated sport gear: €510-610 (one-time investment, lasts 5-8 years)
Trad & Multi-Pitch Gear: Advanced Climbing Setup
 Trad & Multi-Pitch Gear: Advanced Climbing Setup
Trad climbing requires placing your own protection as you climb. Multi-pitch adds rope management complexity. Both are significantly more involved than sport climbing but unlock access to incredible climbs. We’ve tested this gear at Chodes, Valdemanco, El Chorro, La Pedriza, Millau, Rodez, Portland, Tenerife, Rocha da Pena, Labeil and more.
Protection Rack (Cams & Nuts)
Cams
- Range: 0.5″ to 2″ (12-50mm) covers 90% of crack widths
- Get duplicates in 0.5-1.5″ — two parallel same-size cracks is common
- Placed in flared cracks; camming action prevents outward pull
- Brands: Black Diamond, Wild Country, Totem
- Poor-quality cams have loose lobes — one bad placement creates panic
Nuts
- 13-16 nuts from #0 (tiny) to #8 (fist-sized)
- Wedged into crack constrictions — no moving parts, extremely reliable
- ✅ vs cams: Lighter, don’t fail, more reliable
- ❌ vs cams: Slower to place, not for all crack types
Slings
- Extend protection, equalise placements, build anchors
- Pre-cut cordelette 8-9mm nylon, 6-8 slings (€40-60)
- Pre-sewn slings various lengths (€20-30 each)
- 12-15 units total for flexibility
- Keep total sling weight under 1kg
Multi-Pitch Specific Additions
Double Rope System
- 2x 60m ropes (9mm) for full flexibility
- Rappel up to 120m total descent capability
- Belay on one rope while other manages descent
- More margin for error on route-finding
Anchor Building System
- 2-3 pre-made Prusik loops (backup safety)
- Carabiner-sewn sling (direct angle adjustment)
- Cordelette system (dynamic equalisation)
Placement Technique for Trad
Crack climbing demands understanding: Not all cracks accept protection equally. Good cracks have constrictions (where size changes). Bad cracks are uniform width (protection slips out under load).
Crack types matter: Finger cracks (0.5-1″), hand cracks (1-2″), off-width (2-4″), chimneys (4″+). Each type uses different protection. Off-width protection is often minimal—these routes demand commitment.
Critical for trad: Understand placements aren’t bomb-proof. Each piece has limitations. Build redundancy by using multiple placements near critical sections. Never trust single piece for long potential fall.
Van Climbing Essentials: Trad & Multi-Pitch Gear Summary
- Cam rack: 15-20 cams covering 0.5″-2″ (€800-1,200)
- Nut rack: 13-16 nuts complete set (€120-180)
- Slings: 12-15 individual units mixed lengths (€100-150)
- Multi-pitch ropes: 2x 60m ropes (€300-400)
- Anchor backup: Prusiks, cordelette system (€50-80)
- Total trad-specific investment: €1,400-2,010
- Combined with sport setup: €2,000-2,800 total climbing gear
All Conditions: Weather Preparedness
 All Conditions: Weather Preparedness
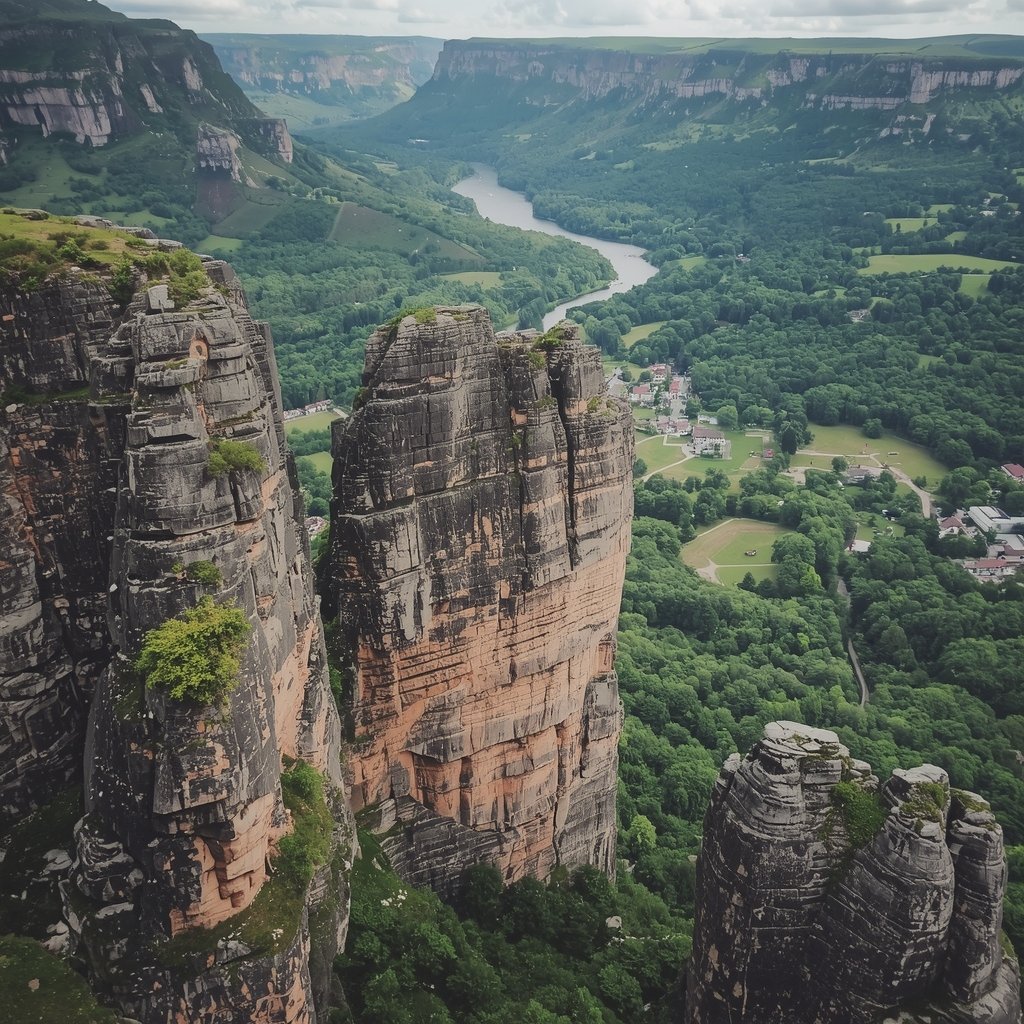
European weather is unpredictable. You can encounter Mediterranean heat at the coast and alpine snow within 3 hours of driving. Your gear setup must handle seasonal and regional extremes.
Clothing System for Climbing
Base Layer
Merino wool — temperature-regulating, odor-resistant. Stays fresh after 5 days of climbing. Synthetics become permanently smelly after sweat.
2-3 sets so one is always clean.
Midlayer
Lightweight fleece for 10-15°C worn under shell in wind. Down or synthetic insulating jacket for alpine/winter below 5°C.
1-2 pieces covering the full range.
Shell Layer
Climbing-specific — allows arm movement, not bulky. Breathability is critical: non-breathable shells trap sweat, worse than being wet from rain.
1 rain shell + 1 wind shell.
Sun Protection
Wide-brim hat protects face and neck. SPF 50+ reef-safe sunscreen. UV arm sleeves optional but valuable on long multi-pitch routes.
Footwear Options
Approach
Light hiking boots — ideal to ramble through bushes and rough approach trails
Climbing
All year round climbing pair — taken care of meticulously, used for 90% of sessions
DWS
Secondhand pair from a gym lost & found — zero guilt jumping into the water
Seasonal Adaptations
Winter
Insulating gloves thin enough to feel holds, warm enough for 0°C. Thicker base layers. Wind shell always accessible. Hand warming is priority #1.
Summer
Minimise layers. Focus on sun protection. Climb early morning for cooler temps and better skin adhesion before afternoon heat.
Transition
Most volatile period. Bring full layer range regardless of forecast. Mountain weather changes in minutes.
⚠️ Real talk: Most European climbing accidents involving weather happen in transition seasons. Climbers see “mostly sunny” forecast and underdress. Mountain weather doesn’t care about forecasts. Bring layers.
5 Things We Wish We’d Known (From 2+ Years of Vanlife Climbing)
1. Dry Your Gear Every Single Night
This isn’t negotiable. Mold in a van moves fast. Within 3 days of damp climbing gear stored without ventilation, you’ll have visible mold. Mold-damaged ropes are destroyed. Mold-damaged harnesses are dangerous.
Our system: Immediately after climbing (even if just slightly damp from sweat), we hang everything on hooks in the van. Open ceiling vent. Leave for 2-4 hours. Every. Single. Night.
In winter, this takes planning (limited space, multiple layers of damp gear). Solution: Multiple hooks, rotation system, accept that the van looks like a climbing gear laundry for 2-3 hours post-climb.
2. Pack for Temperature Swings, Not Forecasts
We’ve climbed in 30°C by the Mediterranean coast at sea level, then driven 3 hours inland and 1,000m elevation to 5°C alpine limestone. The forecast said “sunny and warm all week.”
Real preparation: Ignore what the forecast promises. Accept that European weather is unpredictable within 24-hour blocks. Bring your full layer system regardless. Yes, you won’t use everything every day. But underdressing on the day you need it isn’t an option.
3. GPS Parking Coordinates Matter More Than You Think
Wasting 45 minutes searching for parking near a crag is frustrating. Wasting 45 minutes looking for parking after a hard climbing day when you’re exhausted and hungry is genuinely dangerous (poor decision-making, increased accident risk, frustration compounds into arguments).
Why it matters: Exact parking GPS coordinates (not “look for signs,” but “44.1256°N, 3.1528°E”) mean you arrive, park, climb, and rest. Every crag guide should include this.
Park4Night — our go-to app4. Organise Gear by Mission, Not By “Climbing Gear”
Having one massive “climbing gear” zone is chaos. You end up moving 15 pieces to find what you need for today’s climb.
What works: Sport day pack. Trad day pack. Multi-pitch pack. Pre-packed before you leave the van. First at crag, you grab one bag. Done. All else stays safely stored.
Time investment: 15 minutes organizing packs after climbing → 30 minutes saved next climbing day. Plus zero stress about forgetting gear.
5. Overuse Injuries Kill Climbing Trips Faster Than Weather
We learned this the hard way. Climbing hard 6-7 days in a row feels amazing until day 8 when tendonitis flares. Then you’re stuck in the van unable to climb for 1-2 weeks.
The fix: Build rest days into every week. Climbing 5 days hard, 2 days easy/rest is sustainable. Climbing 7 days hard inevitably breaks you.
What to do on rest days: Explore areas you’re climbing in. Work on van maintenance. Cook elaborate meals. Read. Sleep more. Your tendons will thank you, and you’ll have stronger climbing when you return.
Ready to Outfit Your Climbing Van?
Start with storage and power systems. Build your gear collection gradually. The best van setup is the one you actually use and refine continuously.
🧗 Explore Our Climbing Guides
Detailed crag guides from our van life climbing adventures across Europe
🇪🇸 Spain
🇫🇷 France
🇵🇹 Portugal
🇬🇧 UK
Van Life Gear & Logistics Context
Keywords: Space-Saving Climbing Gear • Van Storage Solutions • Portable Hangboards • Solar Charging for Climbers • Nomadic Gear Maintenance • Moisture Control in Vans • Compact Trad Racks • Multi-Fuel Stoves • European Van Life Logistics • Gear Longevity on the Road