From indoor to outdoor climbing: How to Transition Your Climbing Skills to European Crags
From gym walls to real rock. Everything you need to know before your first outdoor climb.
You’ve climbed the gym walls countless times. You’re strong, technically solid, and ready for real rock. But stepping onto an actual crag for the first time? That’s a completely different world.
The transition from indoor climbing to outdoor crags is one of the most rewarding shifts in any climber’s journey—but it’s also one of the most misunderstood. Your strength translates. Your technique partially transfers. But the mental game, the movement style, and the entire approach to climbing outdoors? That’s almost like learning from scratch.
After transitioning from years of gym climbing to outdoor sport and trad climbing across European crags, we’ve learned that doing this transition right makes all the difference. This guide covers what we wish we’d known before our first outdoor experience—and what will help you avoid the mistakes that catch most gym climbers off guard.
The Mental Shift: Why Outdoor Climbing Feels Completely Different
Bouldering to Rock Climbing: The Reality Check
If you’ve been bouldering indoors, you’re probably strong. Maybe very strong. But here’s the truth: strength is maybe 40% of what you need outdoors. Strategy, technique, stamina, and mental resilience make up the rest.
Indoor bouldering rewards power and explosive movement. You’re climbing problems 12 feet high with crash pads underneath. The psychology is: go hard, try hard, fall hard, try again. Outdoors, the equation completely changes.
Rock Climbing Demands Different Thinking
Outdoor climbing—whether sport or trad—is about endurance, technique, and planning. You might climb for 30-50 minutes on a single route. You’re reading the rock, adjusting your technique for unfamiliar texture, managing your energy, and dealing with weather, wind, and real exposure.
The mental game shifts too:
- Commitment: On a rope, you’re committing to completing the route. You can’t just jump down when you’re tired.
- Exposure: Climbing 50 meters above the ground—even with perfect protection—feels fundamentally different than a 12-foot boulder problem.
- Rock variability: Every crag has different rock. Different texture, different grip sizes, different movement style. Your technique needs to adapt immediately.
- Weather dependency: Rain, wind, cold—these aren’t problems. They’re conditions you climb in or around.
- Pacing: Indoor climbing is about maximum effort on each problem. Outdoor climbing is about smart effort across multiple pitches.
The biggest mental shift: Stop thinking “I need to get this route.” Start thinking “I need to climb this route well, learn from it, and come back stronger.” The outdoor mentality is patient. It’s sustainable.
Your First Outdoor Experience: Do It Right
Start With a Trusted Group or Solo with Friends
From indoor to outdoor climbing, here’s what we learned: your first outdoor climb should be with people you trust or in an organised group setting. Not because you can’t handle it alone, but because you want proper feedback and guidance. And you also simply need someone that can handle and show you the very basic rope work.
The first experience teaches your body what outdoor rock feels like. It teaches your mind what real exposure feels like. And it teaches you whether you actually enjoy it (spoiler: you probably will).
Find local climbing clubs, organised introductory sessions, or go with experienced friends who’ve climbed outdoors before. They’ll catch the small things—like how you’re holding the rock wrong, or how you’re panicking unnecessarily about protection—that make the difference between loving it and being put off.
Then Get a Proper Course
After your first taste, if you’re serious about this, invest in a proper outdoor climbing course. For me, unless you have a friend that can take time and is an instructor, this is non-negotiable if you want to climb outdoors safely and confidently.
We did sport and trad climbing courses simultaneously—and this is genuinely the best foundation you can build. Here’s why:
- Trad climbing teaches everything sport climbing needs: Understanding rock, reading protection, managing fear, climbing technique—trad covers it all and more.
- Sport climbing is actually simpler than trad: Once you understand trad, sport climbing (clipping bolts) feels straightforward.
- Long-term flexibility: With both skills, you can climb anything. Sport crags, trad crags, mixed routes. The climbing world opens up.
- Confidence across situations: Trad climbing builds problem-solving skills that make you feel secure in almost any climbing situation.
- Trusted Climbing Course Providers:
Portugal Spain UK
The course investment pays for itself: A good course (typically 150-400€ for a day) teaches you safety, proper technique, and mental frameworks that prevent costly mistakes. It’s genuinely worth every penny.

Physical Skills & Technique: What Actually Transfers
Your Strength is only one part of the picture
If you’re a strong indoor climber, you already have the physical foundation. But transitioning to outdoor climbing requires different physical demands:
- Endurance over power: You need stamina more than explosive strength. A 30-minute sport route demands sustained effort, not bursts of power.
- Footwork becomes crucial: Outdoor rock demands precise footwork. Indoor gym walls are often forgiving. Real rock isn’t.
- Grip variability: You’ll encounter pockets, slopers, crimps, jugs—sometimes in the same 10 meters. Your hands need to adapt.
- Body positioning: Gym routes often have obvious sequences. Outdoor routes require reading the rock and adjusting your body position constantly.
The Good News: Bouldering Strength Helps
If you’ve spent years bouldering, you’re already stronger than most climbers. That’s genuinely an advantage. Use it, but don’t rely on it.
The transition is easier if you’re already strong—but the strongest gym climbers sometimes struggle outdoors because they expect power to solve problems. It won’t. Technique will.
Physical reality: You’re probably already strong enough to climb outdoors. You don’t need to get “more fit” before trying. You need to develop outdoor technique, which only happens by climbing outdoors.
Gear: The Massive Difference from indoor to outdoor
Bouldering: No Gear
Bouldering is simple: crash pad, brush, climbing shoes. That’s it. You’re climbing 12-15 feet high with thick pads underneath. Gear isn’t involved.
Indoor Climbing: Minimal Gear
Indoor rope climbing requires harness, rope, and belay device. But everything is controlled. The anchors are perfect. The route setting is safe. The bolts are regularly inspected. Gear exists but barely factors into your consciousness.
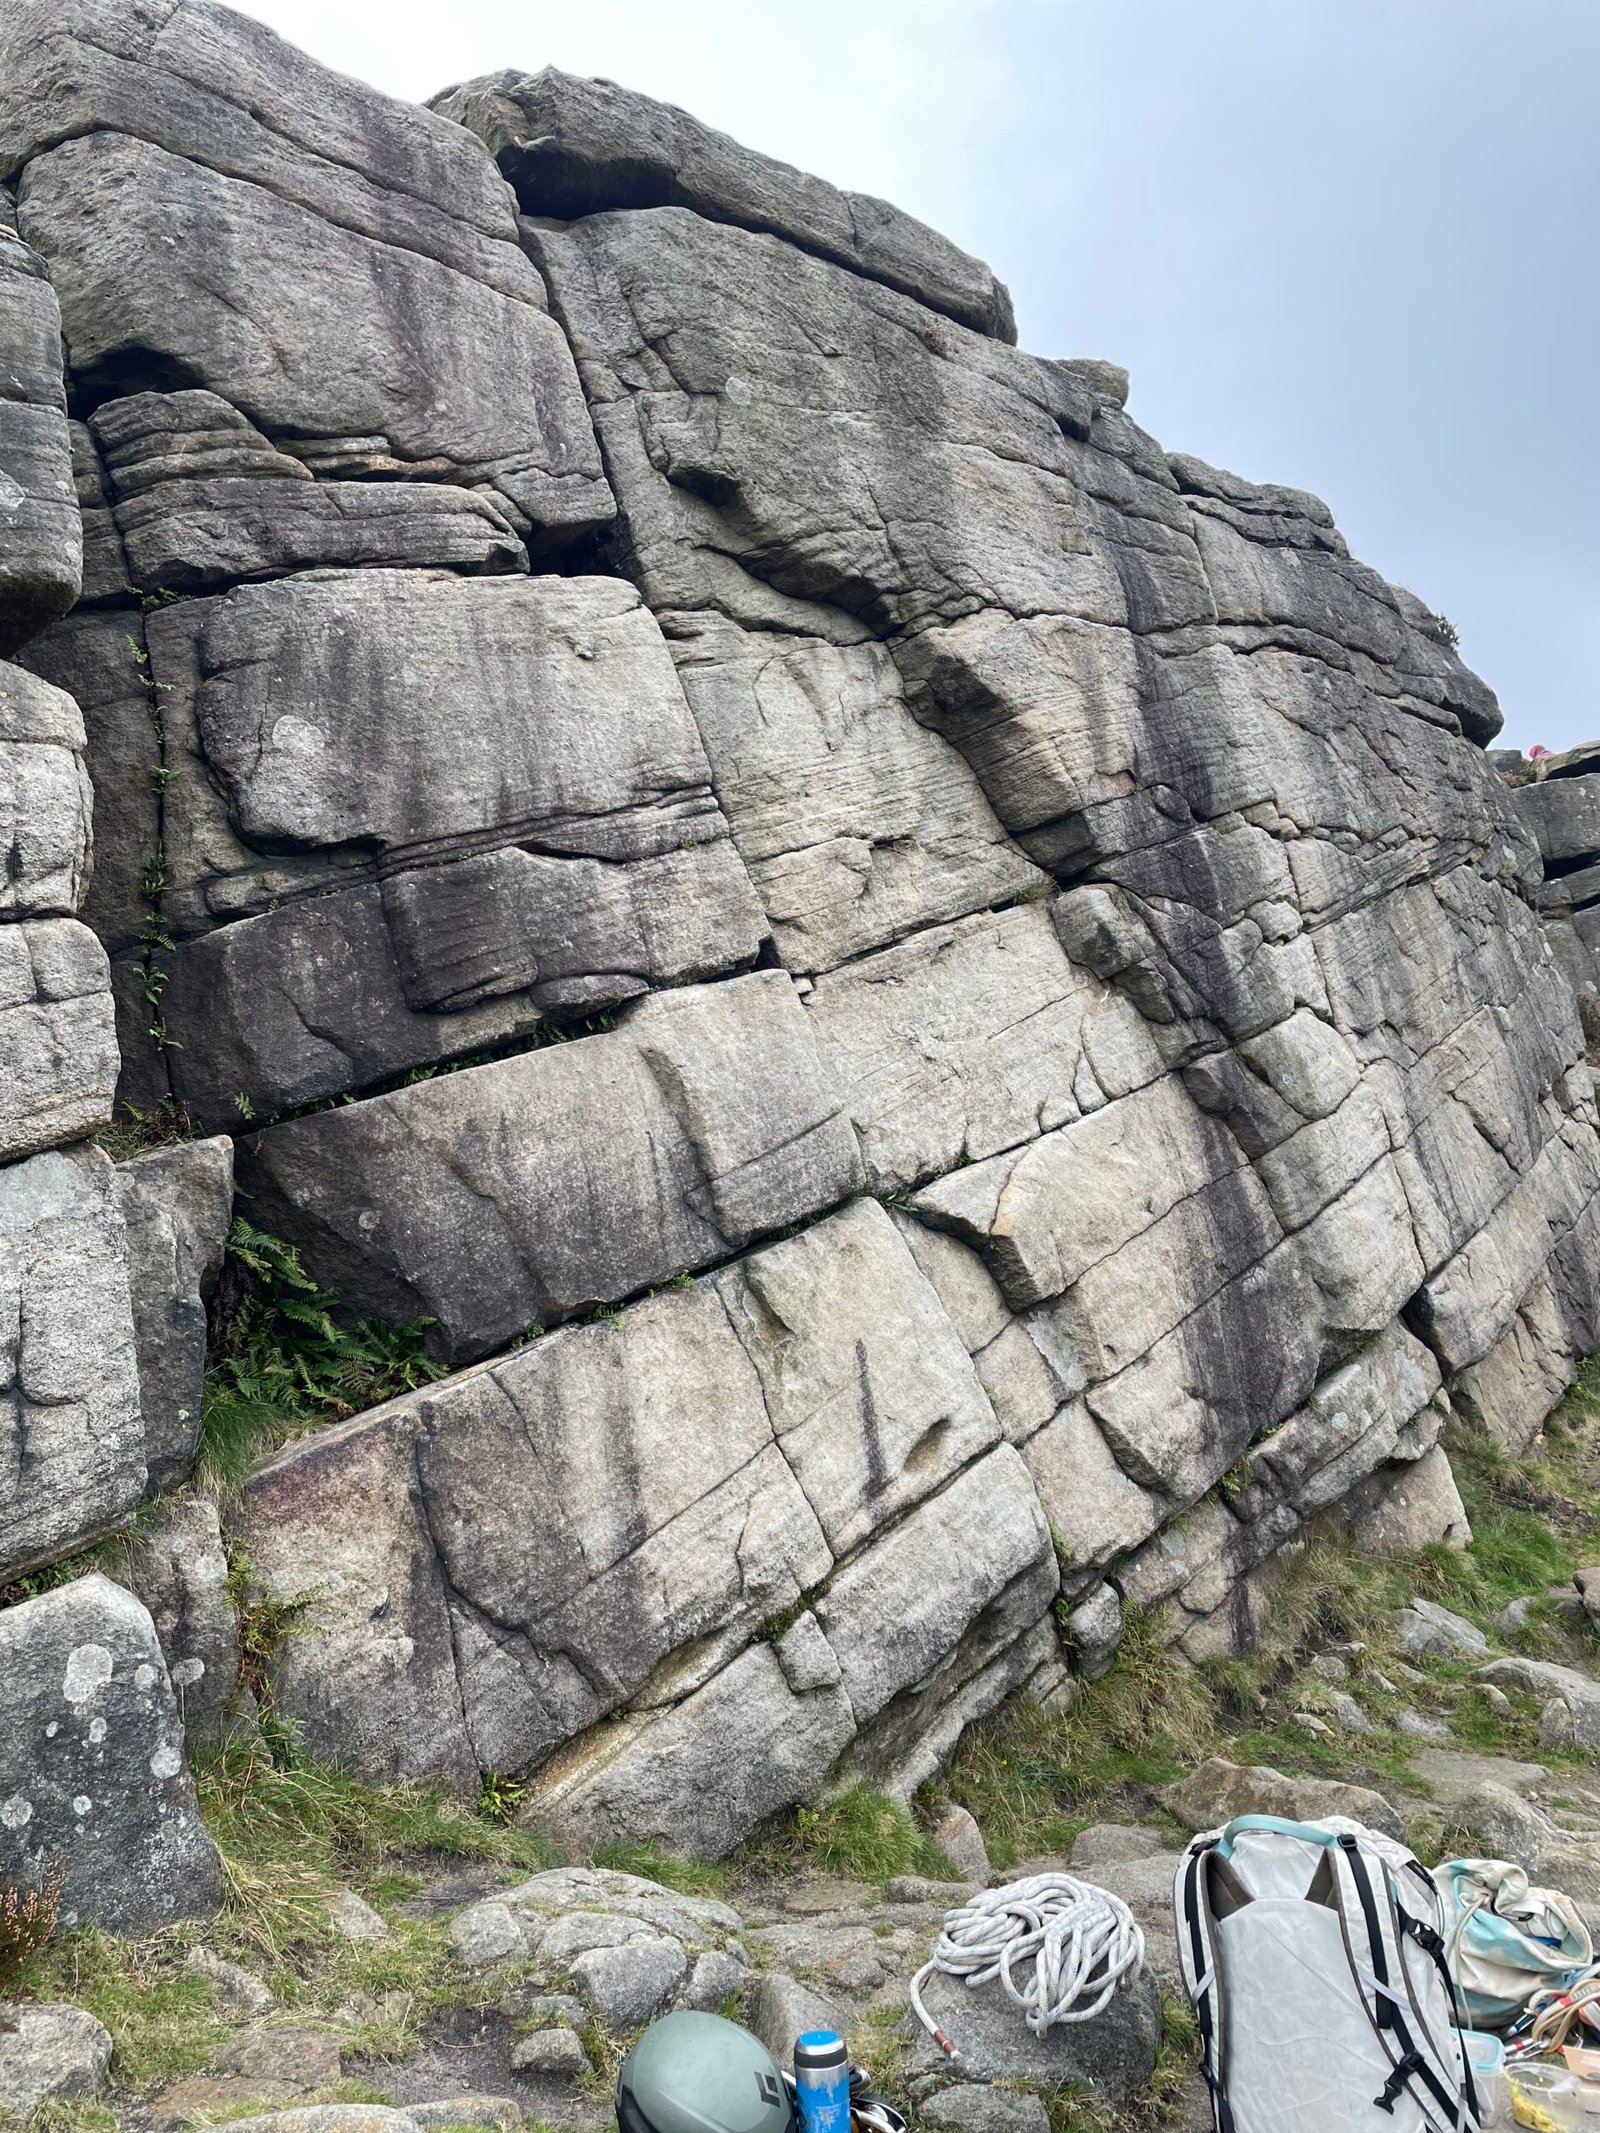
Outdoor Sport Climbing: Full Gear Setup
This is where things get real. Sport climbing outdoors requires:
- Climbing shoes
- Harness (properly fitted)
- Rope (60-70m, depending on route length)
- Belay device & carabiner
- Quickdraws (12-18 of them)
- Helmet (genuinely essential)
- Chalk, brush, backup gear
You’re responsible for your own safety. Bolts are installed by climbers, sometimes decades ago. They might be corroded. Protection might be inconsistently spaced. You need to think constantly about gear.
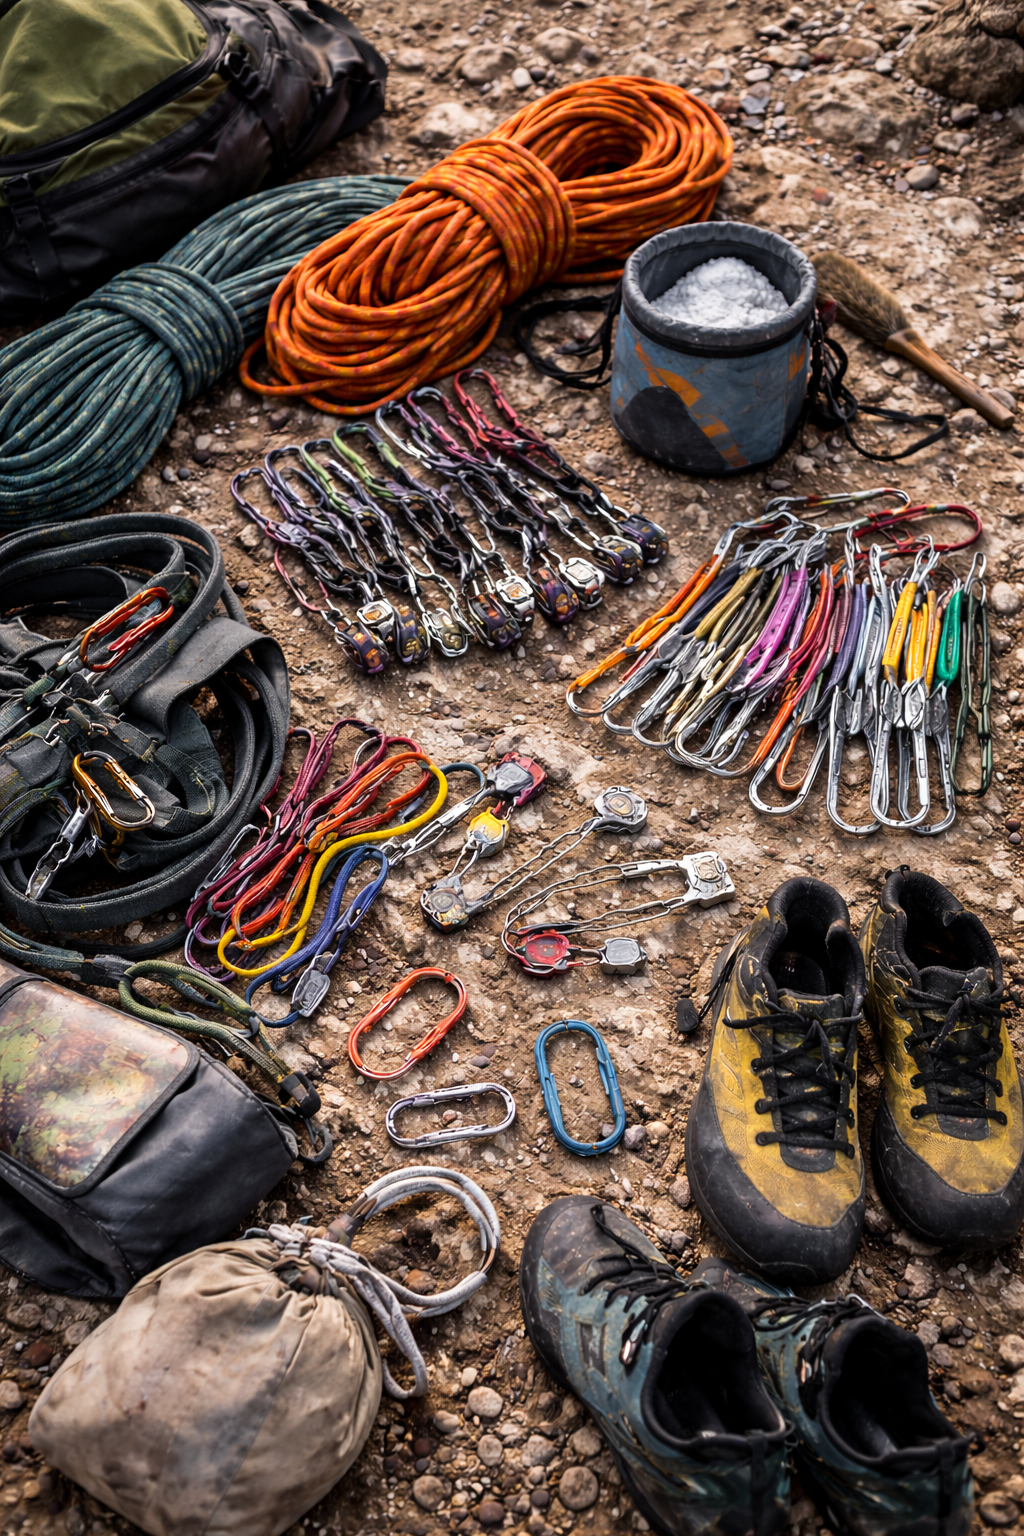
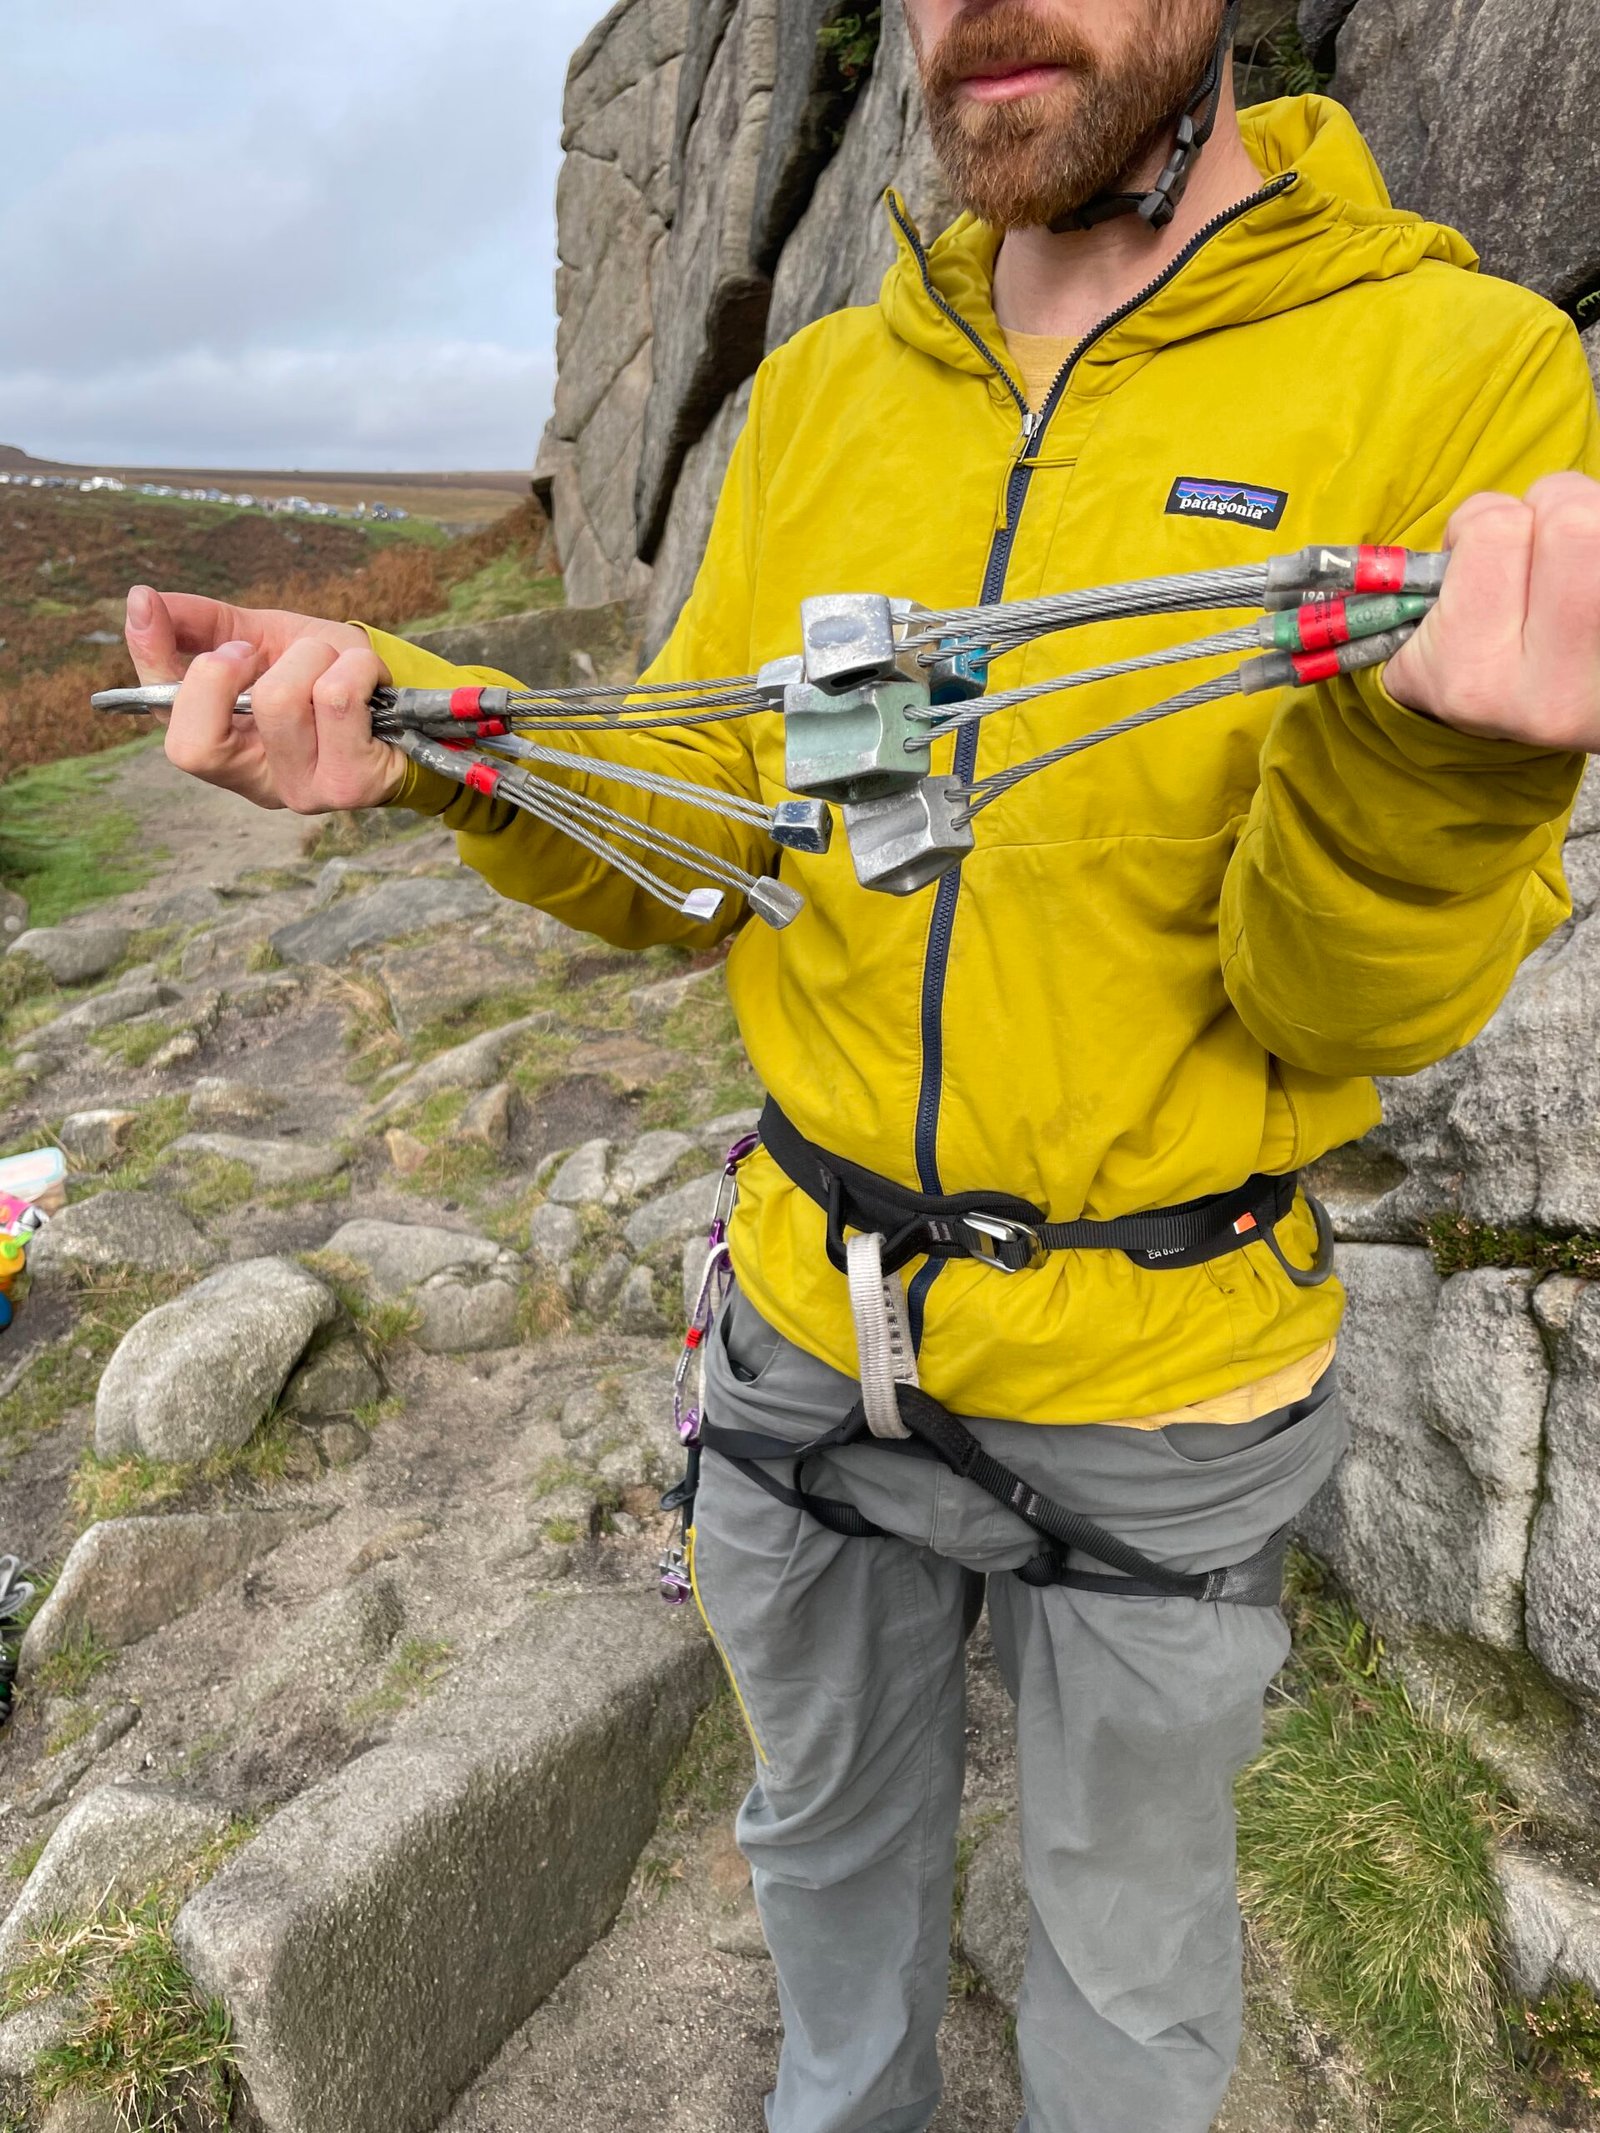
Outdoor Trad Climbing: A Different Dimension Entirely
Trad adds another layer: you place your own protection. Instead of clipping bolts, you place cams, hexes, and stoppers as you climb. You remove them as you descend.
This is genuinely transformative. Suddenly, climbing becomes problem-solving. You’re reading the rock, deciding where protection can go, placing it correctly, and managing risk actively. It’s more complex, more engaging, and—for many climbers—more rewarding than sport climbing.
Why trad is worth learning: Trad climbing makes you a better climber overall. You understand rock structure, protection, risk management, and movement in ways sport climbing alone doesn’t teach. Plus, trad crags are often less crowded and in more beautiful locations.
The Gear Learning Curve
Everything about gear changes outdoors. How to tie in correctly. How to belay safely. How to place protection. How to use a quickdraw (seems simple, but there’s technique). How to manage a rope on a multi-pitch route. How to rappel.
This is exactly what a course teaches you. Don’t skip this. Good gear discipline prevents accidents. Period.
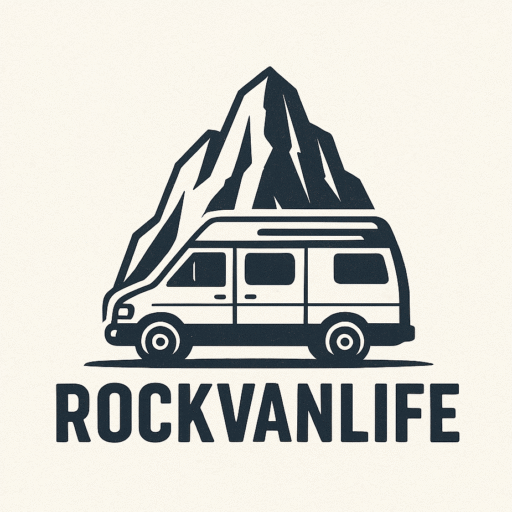
European Crags: Rock Types & Regional Climbing Differences
Rock Varies Dramatically Across Europe
Here’s something gym climbing never taught you: rock type fundamentally changes how you climb.
Granite feels different from limestone. Sandstone demands different techniques than both. And within regions, local climbers develop specific styles based on what the rock demands.
Regional Climbing Styles: No Right or Wrong, Just Different
One of the fascinating things about climbing European crags is discovering that different regions have evolved different techniques. These aren’t better or worse—they’re proven solutions to local rock and you will choose based on your need and technique. Single is different than multipitch, single roping is different than double roping.
Examples of regional variation:
- Figure-8 vs. other tying techniques: Some regions teach figure-8 knots for tying in. Others teach other methods (overhand follow-through, etc.). Both are safe when done correctly. You’ll encounter both. The “best” method depends on personal preference and what you learned in your course.
- Belay technique variation: Some climbers use ATC-style devices, others prefer GriGris. Some use full-body belays, others use hip belays. These reflect regional tradition and proven safety records.
- Footwork and body positioning: Granite climbing in places like Switzerland demands slightly different footwork than limestone in areas like France. Watch local climbers and adjust.
The point: when you visit a new crag in a new region, watch how locals climb. Not to copy exactly, but to understand what the rock demands. You’ll learn something every time.
Regional climbing diversity is a strength: Instead of thinking “that’s the wrong way,” think “that’s proven by local experience.” You’ll learn faster and adapt better when you see variation as valuable rather than incorrect.
Common Mistakes Gym Climbers Make Outdoors
Starting a Route Without Enough Quickdraws
This is genuinely the most common mistake from indoor to outdoor climbing. You look at a route from the ground. It looks manageable. You start climbing with 12 quickdraws thinking “that’s enough.”
Then you get halfway up and realise bolts are closer together than you thought. Or the route is longer than expected. Suddenly you’re 8 metres up with no more quickdraws. Now you’re panicking, committing to a clip, managing complex movement under stress.
Solution: Count bolts before you start. If you’re unsure, bring extra quickdraws. It’s genuinely the safest choice.
Rope Too Short for the Terrain
This one catches climbers off guard constantly. You bring a 50-metre rope thinking it’s plenty. Then you reach the anchor and realise you’re 60 metres up. The rope doesn’t reach the ground.
Now you’re rappelling on a single rope, managing rope management on the ground, dealing with rope drag. It’s manageable with experience but genuinely stressful when you weren’t expecting it.
Solution: Ask locals about rope length needed. Scout the descent path. A 60-70 metre rope is standard for European single-pitch crags—but some routes are longer. Get the right topos, get the right climbing guide.
Underestimating the Mental Challenge of Exposure
You’ve climbed indoors for years. You’re comfortable at height on ropes. Then you climb outdoors 40 metres up with real exposure (nothing below you but air) and suddenly your brain is screaming.
This is completely normal. Exposure—real exposure where you can see the ground below you—is psychologically different from climbing indoor walls. It takes time to adjust.
Solution: Start on established beginner crags with easier routes. Let your mind adjust gradually. Every time you climb outdoors, the exposure gets more comfortable.
Not Bringing a Helmet
Indoor climbing never requires helmets. Outdoors? Rocks fall. Anchors fail. You swing during falls. Helmets save lives.
Bring a helmet. Wear it every single time. No exceptions. This isn’t negotiable.
Climbing Routes Beyond Your Grade Without Good Reason
Indoor grades don’t translate directly to outdoor grades. A grade 6a in the gym might be grade 6a+/6b outdoors depending on rock type. Most gym climbers find their first outdoor climbs harder than expected.
Start conservatively. Climb routes clearly below your ability first. Let your body understand outdoor movement. Then progress.
Finding Your First Outdoor Crag: Where to Start
Portland, UK: Where we started – Check our guides Click here
If you’re learning to climb outdoors in the UK, Portland is genuinely legendary. It’s where countless climbers had their first outdoor experience—including us. And for good reason.
Portland has everything: accessible routes across multiple grades, solid protection, established beginner sectors, and a genuine community atmosphere. The climbing is quality, the rock is forgiving to learn on, and the crag is beautifully situated.
If you’re starting outdoors in the UK, Portland should be on your list. It’s not just a crag—it’s a rite of passage for outdoor climbers.
Beyond Portland: European Crag Selection
Once you’re ready to explore beyond the UK, Europe is genuinely a paradise for climbing. But finding the right crag for your level takes strategy.
- Start with established crags: Areas like the European Climbing Crags Guide section (check our European climbing guides) list crags with clear access, established routes, and infrastructure.
- Ask local climbing communities: Join climbing forums, Facebook groups, or climbing clubs. Local climbers always know the best beginner-friendly crags and current conditions.
- Look for crags with guidebooks: If a crag has published route information, it’s usually established, well-maintained, and climber-friendly.
- Consider rock type: If you learned on granite, start with granite outdoors. If limestone, find limestone. Different rock demands slightly different technique.
Our guide to finding European crags: Check our complete guide to discovering hidden European climbing destinations, accessing verified topos, and navigating crag access like a pro. It covers everything from research to logistics. Click here
Safety & Continuous Learning: Never Stop
Formal Education is Just the Start
A course teaches you fundamentals. But outdoor climbing safety requires continuous learning. Environment, conditions, your own skill development—they all change.
- Read books: Invest in climbing-specific safety books. “The Self-Coached Climber,” climbing safety guides, rope management resources. Knowledge sticks when you read it.

- Practice constantly: Every time you climb, you’re practicing safety. Tying in, belaying, managing rope, placing protection (if trad). These skills degrade if you don’t use them regularly.
- Talk with other climbers: Share experiences, ask questions, learn from near-misses and mistakes (yours and others’). The climbing community is genuinely helpful.
- Climb with different partners: Different partners have different approaches. Learning their methods expands your understanding.
Risk Management in Outdoor Climbing
Outdoor climbing carries real risk. Not massive risk if you’re competent—but real risk nonetheless. Respect that. Check bolts. Inspect anchors. Manage rope properly. Wear helmets.
Most outdoor climbing accidents are preventable. They result from rushed decisions, skipped safety steps, or assumptions. Don’t be that climber.
Risk management mindset: Every time you climb, ask yourself: “What could go wrong here? Have I checked for it? Am I managing it properly?” This simple framework prevents most accidents.
The Vanlife Advantage: Why Outdoor Climbing + Van Living Works
Here’s something we discovered: vanlife is genuinely the best way to explore outdoor climbing across Europe. Maybe in the world.
Why? Flexibility. You can climb at a crag for a week, then drive to the next one. You’re not locked into a hotel location. You can stay longer at crags you love or bail quickly if conditions are poor. Weather changes? Move to a different region. Route selection better on Tuesday? Stay through Friday.
Plus, the entire logistics of outdoor climbing become simpler in a van. You have everything you need with you. Gear, food, sleeping space, weather shelter. You’re set for multi-day climbing trips with zero hassle.
The climbing community is genuinely welcoming to vanlifers. Parking spots near crags are often free or cheap. Local climbers share information and advice. And the lifestyle—living in a van whilst climbing the best crags in Europe—is simply transcendent.
If you’re even considering learning outdoor climbing, consider doing it from a van. The combination is unbeatable.
Ready to combine vanlife with outdoor climbing? Check out our Vanlife Climbing Essentials guide for detailed gear recommendations, van setup advice, and insider tips for living and climbing on the road. Click here
Your Transition Checklist: From Gym to Crag
Ready to make the transition? Follow this sequence:
Month 1: Foundation
- ☐ Decide: Sport climbing, trad climbing, or both?
- ☐ Find a course provider in your region
- ☐ Book a beginner-friendly organised session or find experienced climbing friends
- ☐ Get basic gear: harness, belay device, rope, quickdraws
- ☐ Learn knot tying and safety basics at home
Month 2: First Experience
- ☐ Attend organised climbing session or go with trusted friends
- ☐ Climb beginner routes in a familiar, safe setting
- ☐ Journal how it felt—what scared you, what excited you
- ☐ Ask experienced climbers for feedback
Month 3: Formal Training
- ☐ Complete your course (sport and/or trad)
- ☐ Practice everything taught: knots, belaying, safety checks
- ☐ Start building outdoor climbing friends/partner relationships
- ☐ Buy one or two outdoor climbing guidebooks for areas you’re interested in
Month 4+: Consistent Practice
- ☐ Climb outdoors regularly (minimum twice monthly initially)
- ☐ Progress grades slowly—comfort matters more than difficulty
- ☐ Visit diverse crags with different rock types
- ☐ Keep learning: take advanced courses, read, ask questions
- ☐ Join climbing communities, share experiences, help newer climbers
Final Thoughts
The Big Transition from indoor climbing to outdoor crags is i believe one of the best decisions you can make. The experience—real rock, real exposure, real problems to solve—is incomparable to gym climbing.
Do it thoughtfully. Start with experience (organised group or trusted friends). Take a proper course (genuinely worth it). Practice consistently. Learn continuously. Respect the risk.
And remember: every experienced outdoor climber started exactly where you are now. We were all gym climbers once. We all had doubts about our first outdoor experience. We all learned that outdoor climbing is harder, more rewarding, and far more beautiful than we expected.
You’re ready. Go climb.
Perfect places to practice: Chodes, Valdemanco, El Chorro, La Pedriza, Millau, Rodez, Portland, Tenerife, Rocha da Pena, Labeil and more.
Have questions about transitioning to outdoor climbing? Want to share your first crag experience? Drop your thoughts in the comments below—we love hearing climbing stories.
Frequently Asked Questions
I climb 6b in the gym. What grade should I start with outdoors?
Start 2-3 grades below your indoor level. if you climb 6b indoors, look for 5b or 5c outdoors. This gives you room to learn natural movement without the stress of falling. Here is why it feels harder:
- No Colors: Holds aren’t marked. Finding the next “good” grip is a skill in itself.
- Height: Outdoor routes are often 25m+, compared to 12m in most gyms.
- Feet: You have to trust small ripples in the rock rather than big plastic blocks.
What is the biggest mistake indoor climbers make transitioning outdoors?
Underestimating safety systems. In the gym, the rope is already there. Outdoors, you are responsible for the gear. Common pitfalls include:
- Ego: Trying to lead your max gym grade on day one and getting “flash pumped” or scared.
- Anchor Cleaning: Not being 100% confident in how to thread the rope at the top.
- Footwork: “Scuffing” up the rock because you’re used to the friction of gym walls.
Do I need different gear for outdoor climbing versus the gym?
Yes. Your gym harness and shoes are fine, but you will need to invest in the following for sport climbing:
- Helmet: Essential for protecting against rockfall or flipped falls.
- Quickdraws: A set of 12-15 (most routes need 8-12 + 2 for the anchor).
- Rope: A 60m or 70m single dynamic rope.
- PAS (Personal Anchor System): To safely clip into the chains while cleaning.
How do I find climbing partners for outdoor trips?
Safety is the priority here. Don’t just climb with anyone; climb with people who know the systems. Try these:
- Gym Noticeboards: Look for “Outdoor Intro” nights at your local wall.
- Facebook Groups: Search for “UK Climbing” or “Partner Finder” groups.
- Hire a Guide: Taking an “Indoor to Outdoor” course is the fastest way to meet like-minded beginners.
How long does it take to feel comfortable climbing outdoors?
Most climbers find their “groove” after 10 to 15 full days on the rock. It usually follows this pattern:
- Days 1-5: Everything feels scary and difficult.
- Days 5-10: You start recognizing rock features and clipping feels natural.
- Day 15+: You begin to push your grades and enjoy the scenery rather than just the survival!
🧗 Explore Our Climbing Guides
Detailed crag guides from our van life climbing adventures across Europe